We use Google Analytics to measure the performance of our website. We do not store any personal data and your IP address is anonymised.
System Settings
Within the System settings area, you can configure several useful settings that relate to how customers can interact with their phone systems.
You'll find a number of tabs that you can navigate through with different settings that can be configured. When you've finished making changes to any of these settings, just click Save Settings at the bottom of the page to apply them.
General
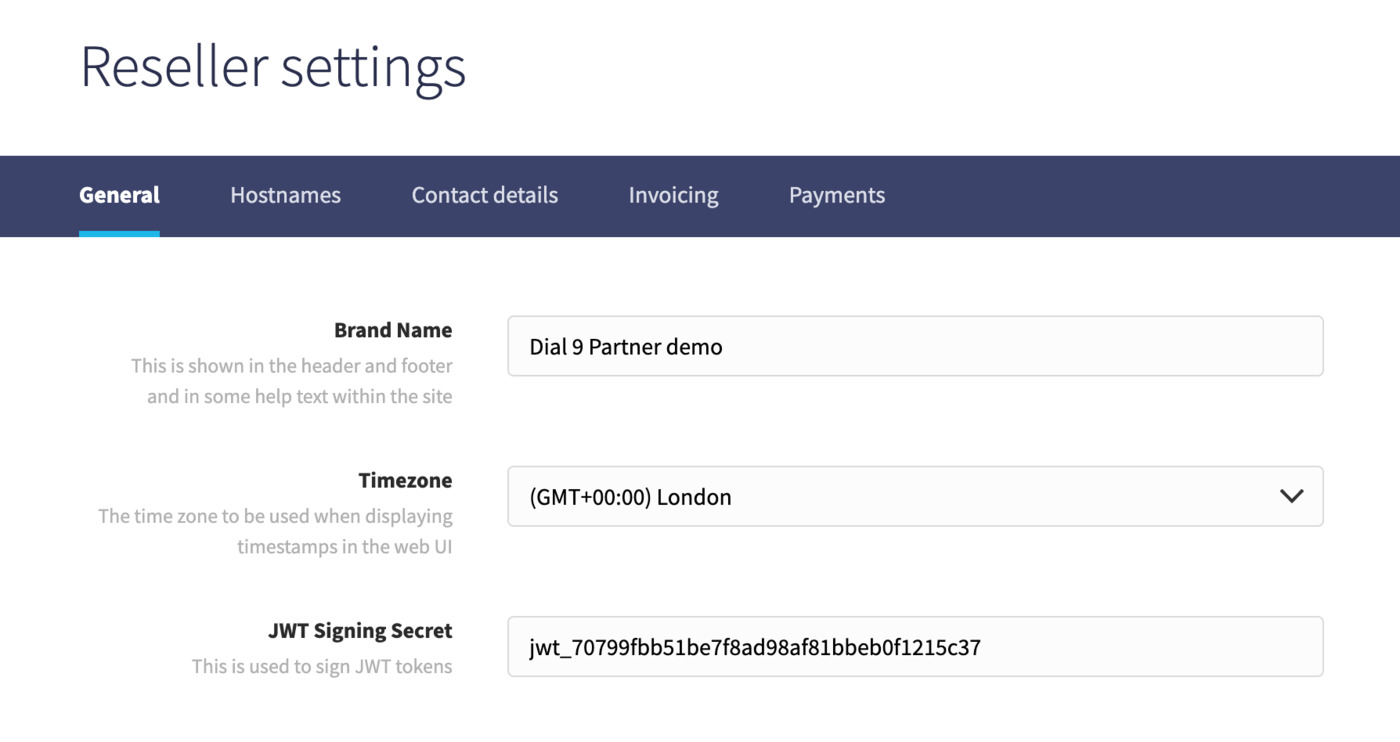
In the first General tab you'll find a number of options relating to your branding:

You can add a brand name to be displayed at the top-left of the interface for anyone that is logged in, then set a local timezone for users accessing the interface.
Hostnames
Within the Hostnames tab you can update settings relating to how users connect their phones to their phone system within your partner account:

Here, you can add a SIP hostname that users can enter in their phones to be able to connect and authenticate with their phone system. When you add a SIP hostname you'll need to ensure you have added the appropriate CNAME record to your domain's DNS configuration, as per our partner prerequisites.
You'll also be able to set both a subdomain that uses our whitelabelled voipcloud.uk domain, and your own completely custom domain. Setting up your own custom domain will require you to contact us so that we can setup SSL.
Contact details
Within the Contact details tab, you enter email addresses for billing, voicemail and support, to be displayed where appropriate in various parts of the interface and also for use in outbound emails to your end users.

You'll be able to see a list of authorised email domains on the right-hand side of the page - these will have been added for you when you set up your partner account with us, and you can get in touch with our support team should require any changes to be made to them. You can only add email addresses on one of the list domains.
You can also enter phone numbers for support and billing, which will again be displayed, where appropriate in the partner interface to end users. If you don't enter a billing phone number, the support phone number will be displayed in its place.
Invoicing
In the Invoicing tab you enter information relating to how customer invoices are generated.

Initially, you'll need to enter your legal name, address and country to be displayed on all invoices.

Next, enter an option invoice number prefix, first invoice number (all future invoices will be incremented by one, from the first number), then any additional invoice text that you may wish to display.
Finally, you can enter your VAT number, and enable the option to automatically add VAT at the current rate to all invoices.
Payments
Within the payments tab, you'll be able to set up different payment processors that you wish to use to take payments from your customers. To be able to use this, you'll need to establish accounts with those providers.