We use Google Analytics to measure the performance of our website. We do not store any personal data and your IP address is anonymised.
Setting up Bria Solo with your Dial 9 extension
Using Bria Solo on your MAC or Windows computer allows you to make and receive calls on your desktop or laptop.
Bria Solo has free and paid plans. If using Bria Solo Free please be aware that features such as call transfers and HD audio will not be available. A full list of differences between plans can be found at the Bria site here.
With Bria Solo, before you can download the software you will need SIP account details added to your Bria account.
Start by heading to the Bria website to create an account, If you already have an account please login.
Once you are logged into your account, please select Voice at the top of the page and then select the option to add voice configuration.

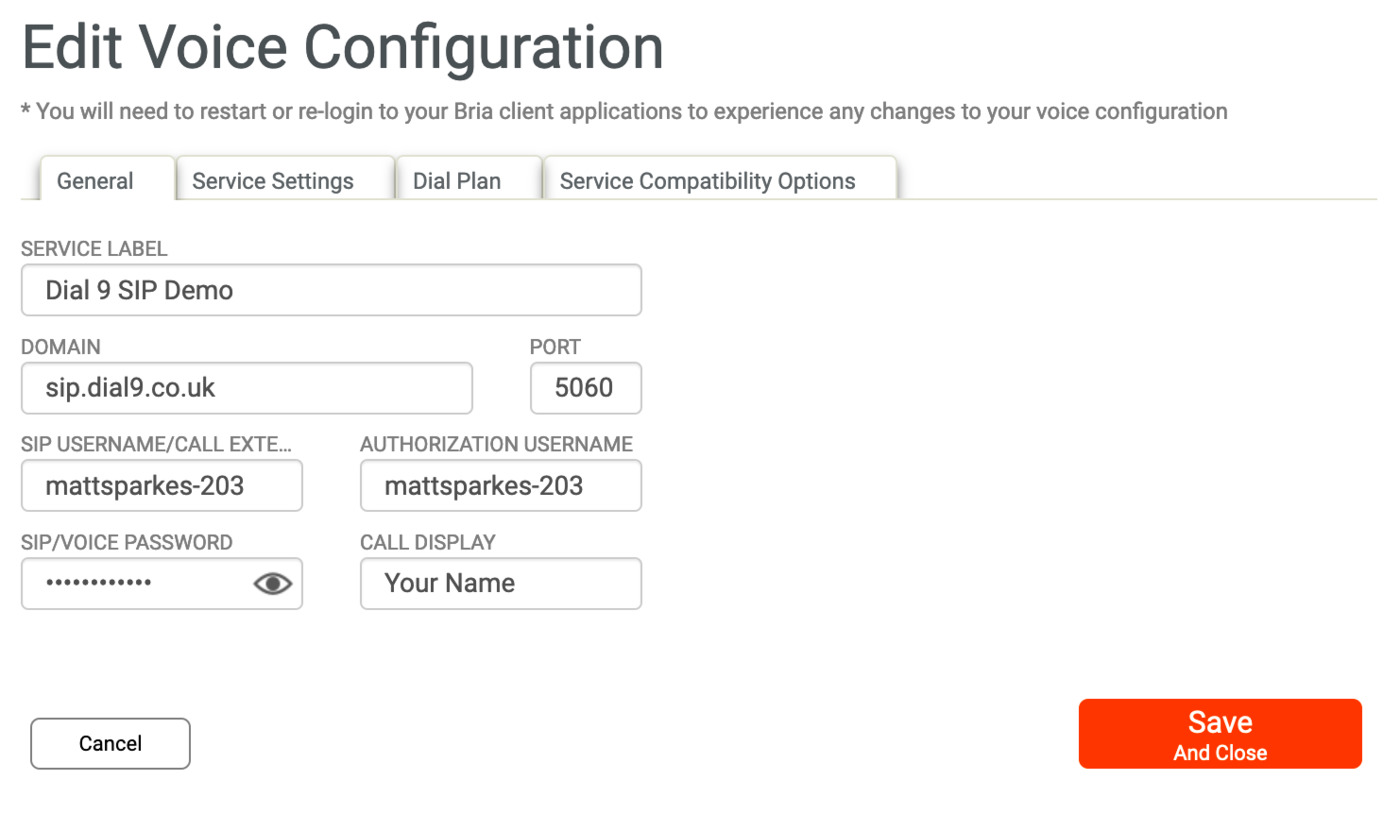
You will need to select Configure SIP Settings and then enter the following:
- Service Label - This will be the name for the service, we would recommend Dial 9
- Domain - This will need to be sip.dial9.co.uk
- Port - This can be left as Auto
- SIP Username - This can be found in the Dial 9 Portal under Extensions, you would need to include the username prefix
- Authorization Username - This will be the same as the SIP Username, including the prefix
- SIP Password - This can be found in the Dial 9 Portal under Extensions
- Call Display - This can be the name of the user

You can now press Save And Close.
To download the Bria software you can either use the downloads links on the Home page or the Download option at the top of the screen.
Once you have installed the Bria software you would then need to login for it to auto-configure.