If you're receiving a high volume of calls, a call queue is a great way to inform customers you'll be dealing with their enquiry shortly, with the opportunity to provide announcements and useful information while they wait.
In this post, we'll explore all the features a call queue in Dial 9 has to offer and how we can configure one to be as effective as possible.
Selecting a strategy
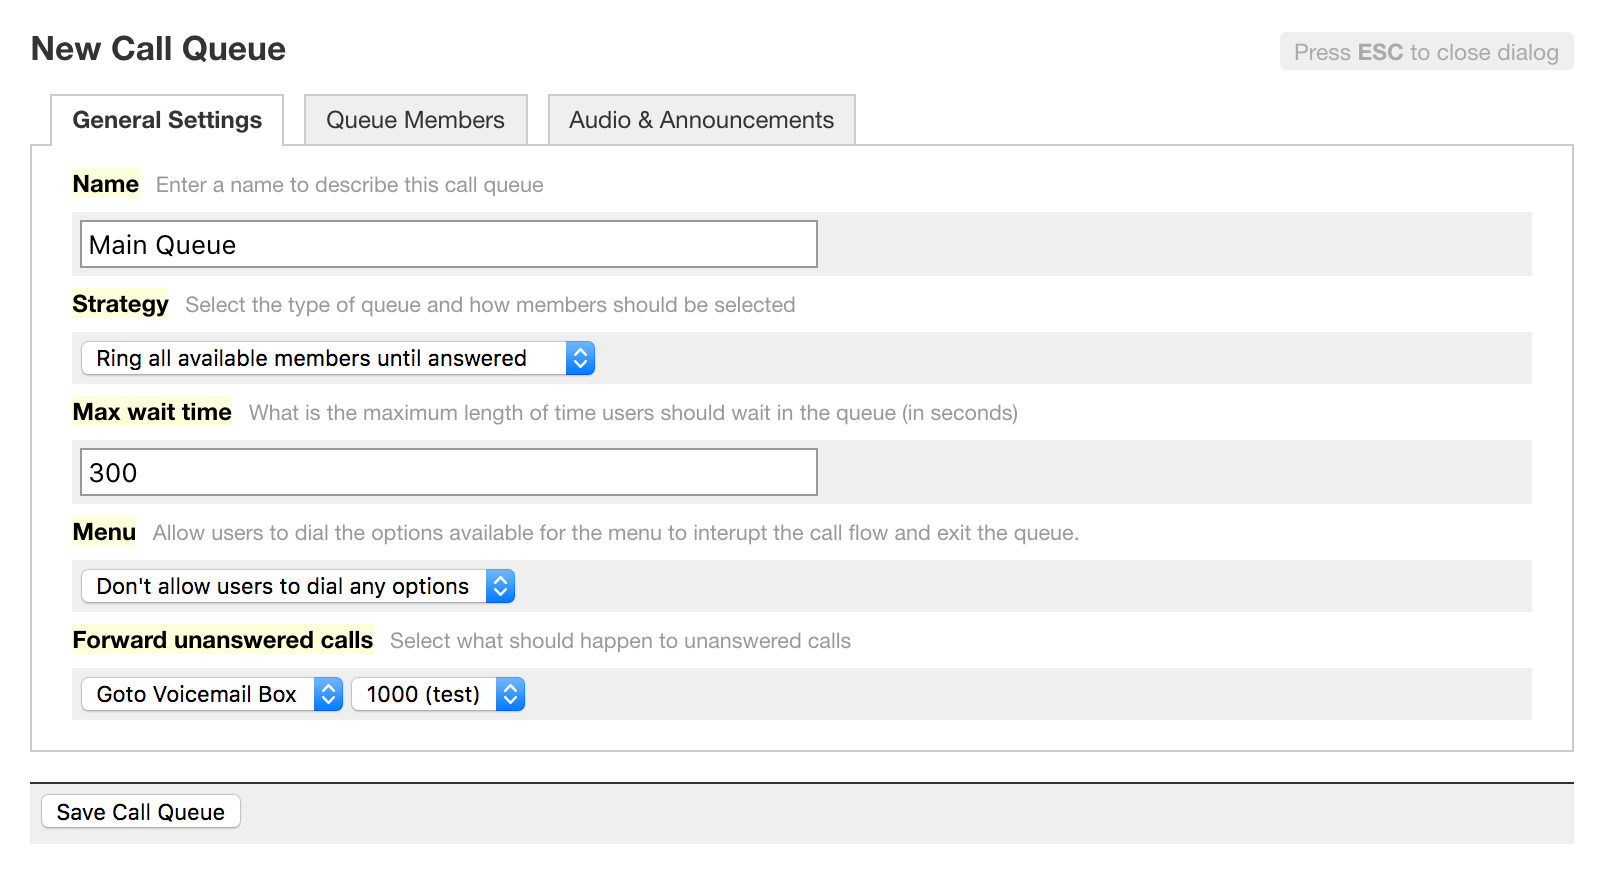
To start, head to Call Queues within the Dial 9 management interface, then click Add New Call Queue.

In the first, General Settings tab, we'll give our queue a meaningful description, then choose a strategy for how the queue should operate. The options for this are as follows:
- Ring all available members until answered
- Take turns ringing each member in turn
- Ring least recently called member
- Ring member with the least completed calls
- Randomly choose a member
These options have been designed with most scenarios in mind, but in our case we'll choose the most simple - Ring all available members until answered.
Next, we'll use the default 300 seconds (5 minutes) for the maximum length of time the caller will wait in the queue, then choose to forward calls not answered in that time to our Voicemail Box so that the caller can leave us a message.
Choosing queue members
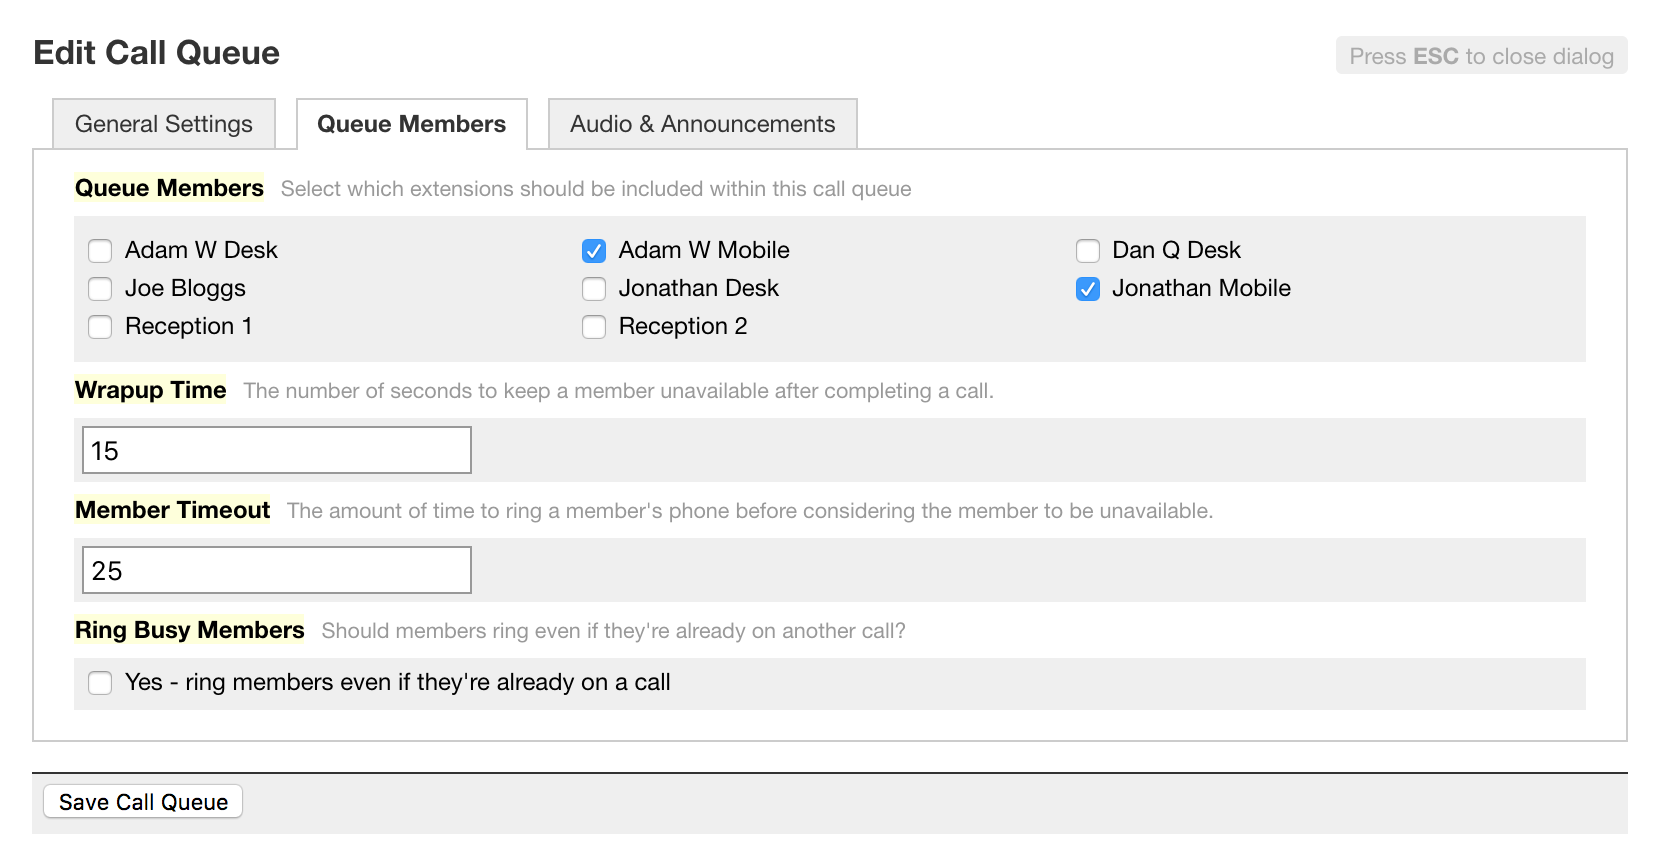
In the Queue Members tab, we'll be able to configure a number of options relating to the staff we wish to assign to the call queue.

Firstly, we'll check each member we wish to add, then choose a Wrapup Time of 15 seconds - this means that when a member has finished a call, they'll have at least 15 seconds before another call comes through to their phone. This is particularly useful if your staff have post-call tasks to complete such as completing a call log.
Next, if we want to add a custom Member Timeout - the amount of time to a ring a queue member's phone before considering the member to be unavailable, we can enter it in a number of seconds. By default, 15 seconds is used which means we will try to ring members for 15 seconds, and if no picks up in that time we will stop trying, then try again after a 2 second pause.
We recommend leaving this as the default setting to ensure that if a previously busy member becomes available, they can be called again quickly if no other member is available pick up the call.
Finally, we'll check the option as appropriate to ring members if they are already on a call.
Choosing audio & announcements
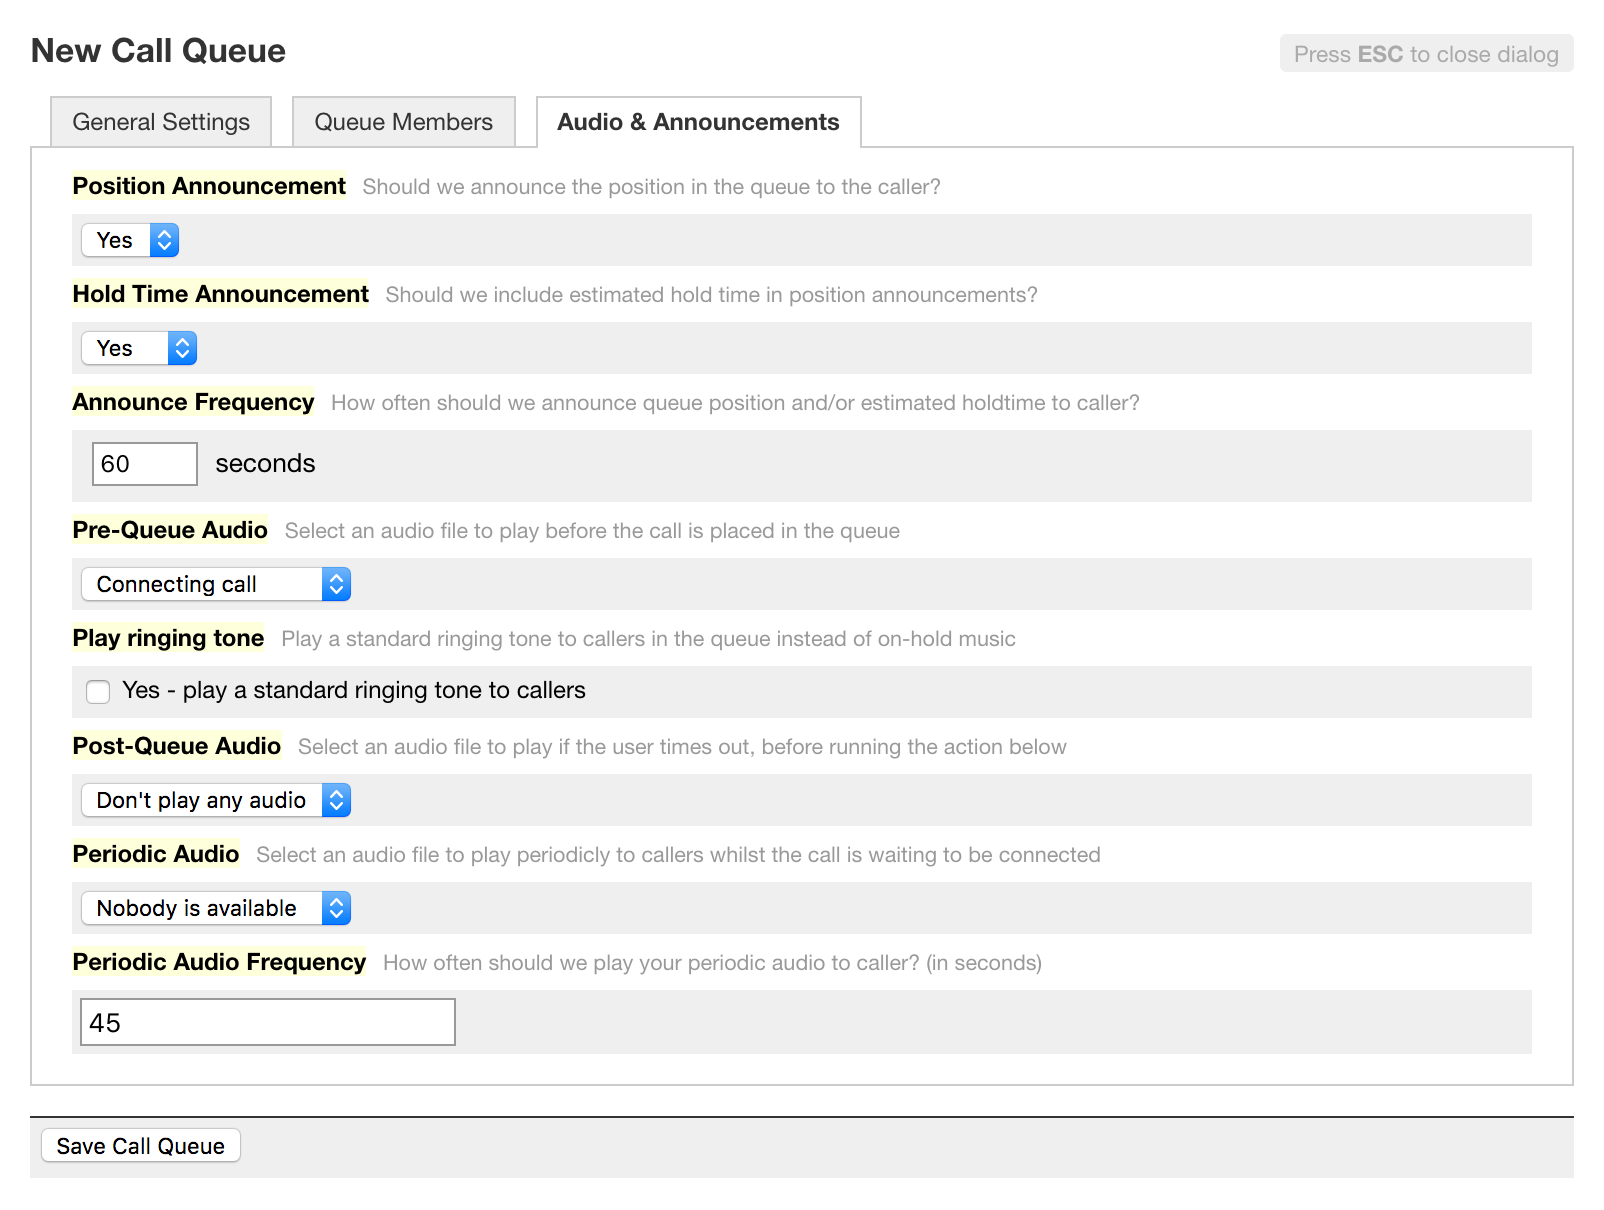
The most important aspect of the call queue when personalising it for your business is the Audio & Announcements tab. Before setting this up, you'll need to record your appropriate audio, then upload it to your File Manager.

In our case, we'll start by choosing both options to announce queue Position as well as an estimated Hold-Time so that the caller is kept informed of their place in the queue, with a frequency of 60 seconds.
Next, we'll chose our connecting call audio file that we've prepared to play as Pre-Queue audio before the caller is placed in the queue - this will tell the caller that we're connecting them to a member of staff. The option to Play ringing tone will be left alone in this case, allowing us to play our on-hold music to the caller instead.
We will also leave Post-Queue Audio disabled, as we're already directing the caller to voicemail if their call isn't answered and they'll hear an appropriate message there. Finally, we'll also add our own custom audio to explain that nobody is currently available but that the call will be answered as soon as possible - to be played every 45 seconds.
All of these options can be chosen independently or in combination with each other to enable you to provide an experience that suits your business.
We hope you've found this post useful, do get in touch with us if you have any questions.
